Sunday, June 12, 2011

Bib and Zig

I found out in February that my cute twin sister is expecting her first baby girl in July after having two boys. I was so excited to get working on a little quilt for her. I have been deprived of baby girl sewing for quite some time and my fingers were itching to do something pink!
I had started making squares using the string quilt technique even before I left Washington about a year ago for new quilts for the girls bedroom. But I never finished. So there sat beautiful Amy Butler fabric squares with no new home. I decided I would have to make something brilliant for Bryn. I agonized what to do for a quilt for her, because I just wasn't happy with lining up all the squares and sewing them in a straight line. After days of walking into my sewing room, rearranging squares with white fabric, walking away, coming back, rearranging more, etc, I dug through my boxes to find my one and only quilt book. I saw a pattern for a big zig quilt. Bingo.
I cut all the squares into triangles and used that pattern as my inspiration. But we all know how big chevron anything is right now, so it's not like this is revolutionary. I am happy to say that I worked it out to accommodate what I already had, and I loved the final outcome. I am not a big "quilter" so I just ran a zig zag running stitch through each chevron strip and called it good. I'm a less is more kind of gal anyway. We are short on fabric stores here, so I went to Joanns and found some subtle ticking strips in the perfect pink for a dainty backing fabric.
With a few extra squares, I made this totally impractical bib. I had to add some fabric flowers since the fabric flower craze came well after my little girl was born. Oh how fun it is to sew for little girls!
I gathered some adorable little outfits, a hot pink stuffed elephant, little Sunday shoes and sewed up some burp rags in coordinating fabric to send off just in time for her shower. I'd be lying if I said I didn't want to keep everything for myself! There is no one else I would rather send it to though! Can't wait to meet my new little niece!
Please excuse the poor quality of pictures. Not enough light, not enough time, and certainly not enough creativity to come up with anything more fancy!

Friday, January 7, 2011

Easy Canvas Backpacks

I, for one, absolutely hate my girls Easter outfits thanks to the months and months of seeing them at the top of this sorry blog. Blek! So for the sake of so many (and by so many, I mean the 7 maybe that might come back every now and again to see if there is anything new) I am adding a recent project.

I try to make something homemade for my kids for Christmas. I saw these backpacks near the beginning of school, but refused to pay $38.00 a piece for canvas backpacks. I guess I filed them away in my head subconsciously, because when I needed an idea a few months ago to help keep my kids happy during church with my husband no longer sitting with us, I remembered these babies right away and thought they would be the perfect Christmas gift to sew after having a baby. Simple, quick, and easy.

Luckily I had also filed away a tutorial for these cute, Valentine chair backers and thought I could adjust for what I wanted. I am so happy with the results. But how hard was it? I mean really. I copied someones overpriced (although extremely cute) idea and pretty much copied someones tutorial. There wasn't a lot of creativity or originality involved, but at least I sewed something for Christmas that my kids love. And they were cheap-cheap to make...my favorite kind of project.

I put inside some Color Wonder books and markers (love those for Sunday clothes and no mess). They also got a small notebook with one of those pens that have the four colors to choose from. My girls think those are the greatest pens ever. And that's it. Less is more when we're at church. I've found that if they have a few markers and a pen with a notebook things go a whole lot better than when I have a duffel bag full of everything but the kitchen sink. I keep the bags up in my closet until Sunday, and put them right away when we get home. That way, hopefully, the novelty won't wear off. But what works for you at church? I'd like to add a rotation of a few things to keep them from getting bored. Any ideas out there?

Monday, March 22, 2010

Easter

I wasn't going to make the girls Easter dresses this year. Things are busy and Easter has snuck up on me. And frankly, I had no idea what type of dress I would make. I wasn't feeling inspired and I didn't want to make a trip to the fabric store without an idea in mind. So I was just going to pass on Easter dresses.
Then, last week, I ran into Wal-Mart to get some photo sleeves. I walked right passed the fabric and next thing I knew I was miraculously standing in front of the bargain shelves. I saw this yellow fabric and LOVED the color. I have always loved mustard yellow, but most of the time, the yellow I see is not exactly the right color yellow. This was perfect, and for $1.50 a yard, I hurry and got 3 yards cut. I knew immediately I wanted gray to go with it, since that is my favorite combination with yellow these days, and wouldn't you know it, I found the gray buried under a few other bolts for $1.50 as well. 2 yards later, I had Easter dresses on the brain.
I love the blog Katie Did and the Easter dresses she made last year for her girls. So I searched through her archives (because I don't have the patience for adorable little roses on a collar...and I know my girls pretty well. They would have refused something so cute!) and saw a dress she did a few years ago and that's what I did for Gwen. Pretty much copied her idea straight off her blog. What's not to love about a simple dress with a huge ruffle right down the middle. Simple enough for me. Thanks Katie. You're a genius.
Being the smart mom that I am, I showed Little Miss Picky the dress I was planning on making and she told me she didn't want it like that with the big ruffle. So, I asked if she's like a skirt with big ruffles instead. Lucky for me, she said yes. I improvised and made Gabs skirt based on a skirt Gwen had just gotten from her Grandma that has been a huge hit.
Now, both girls are happy with their own Easter outfits. Mom's happy she doesn't have to feel guilty for not making something. And it only cost dad $7.50.
Now I just have to figure out what to do for Henry.

Saturday, March 6, 2010

Scrap Swaddle Blanket


That's scrap. Not crap (although some may think otherwise). I had limited time to get a baby shower gift put together, so I didn't have time to go to the fabric store. Plus, I'm trying to get through the fabric I already own before I buy more. I started with my bag of endless scraps. I realized as I started pulling pink fabric out that most were about 4 inches wide. I didn't have a ton of time to sew a baby blanket full of 4 inch squares, so I decided to just leave the scraps the size they were but cut them into 4 inch strips. Some strips are as short as 2 inches, some as long as 18 inches.
I wanted the blanket to be lightweight, since it's a Spring baby. But also because I find with a lot of baby blankets, they're just too bulky to swaddle a baby in. A little newborn can get lost in all that puffy fabric. And there's nothing newborns and momma's like more than a nice tight swaddle to cuddle with.
Instead of batting (which I didn't have anyway and sometimes adds too much loft), I added two layers of muslin to give the blanket a little weight and structure. I know there are fantastic quilters out there, but sometimes I think blankets can get over quilted. I personally, don't like a lot of crazy designs going all through my blankets. I like straight, simple, clean lines. So instead of quilting, I skipped that part all together and decided to tie the blanket. I lined the back with nice, soft white flannel, and tied it with yellow embroidery thread at the corners of each scrap.
I know it looks like a million other things I do, but when you have scrap fabric, things tend to start looking the same. Thankfully, I like the fabric combination and I think it suits a Spring newborn girl rather well. My favorite part are the Small World looking pieces from Alexander Henry's Good Earth line that I used for our game bag. So cute for babies.
The blanket is about 35 inches square. It's the perfect size and weight for swaddling a newborn this Spring. I hope she likes it.
And remember, before you throw your scraps away, think about how they can be made into something nice, easy, and cute. And free.

And yes, I could have asked my daughter to smile and done her hair for the picture-thanks for noticing.

Friday, February 26, 2010

Block Challenge

Oh my blog. Where have I been? The projects are getting completed and the sewing is still continuing, but I am the WORST about posting pictures and keeping this blog updated. I apologize for my lack in motivation when it comes to posting pictures of the things I am working on. Too many other things are filling my plate at the moment. I have a slew of ideas and sewing on the brain. I can not wait to get my hands on all the fabric I have been spying for our new home. I have ideas filling folders and notes and sketches on papers scattered throughout our house. Once we get to Kansas and settle on a house, I'll finally be able to sew all the things I have been saving for years for "when we get a bigger house" and have more room. It's one of the most exciting parts about moving-decorating!
But since I posted a picture of my "work room" and a few mentioned my fabrics, I thought I'd share what I was up too. I wasn't going to mention this unless I won, but here goes anyway.
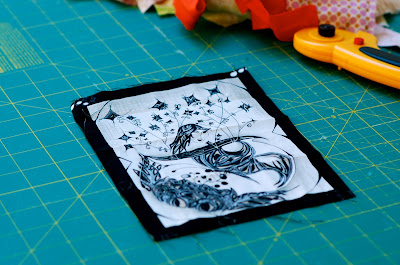
I went to my favorite fabric quilt shop a few weeks ago and they were throwing their first ever block challenge. Basically they were handing out a packet with a 5x7 image from Elizabeth's Studio's "Face the Music" collection. The fabric has a Mardi Gras and Bourbon Street flair. The packets were only being handed out from February 1st through Fat Tuesday (February 16). I showed up on February 15 without knowing they were doing this challenge. The lady explained what they were doing and asked if I wanted to take a packet home. Sure. So I took it home wondering if I would ever do anything with the fabric.
The rules were that you had to use the entire 5x7 piece of fabric and make a 15.5x15.5 quilting square with whatever other fabric you'd like. There are three prizes all worth $50.00. The owners pick, the staff's choice and a drawing with anyone who completed the challenge. The choice awards will go to the blocks that demonstrate the best craftsmanship and creativity. For $50, I'd give it a whirl.
I came home and opened the packet and saw the piece. Not my style at all. So, I decided, I'd think outside the box a little and cut the piece into strips and go more the abstract route. I liked it better that way. I had seen a tutorial for a string quilt and had been wanting to try it so what better chance than for a contest? I shuffled through my scrap fabrics and pulled out pieces I liked and went to work. I really like the way it turned out. I LOVE the idea of this quilt and am glad I at least did the challenge, so now I know I would love a baby's quilt or twin bed quilt with this design.
I am filled with self doubt. So, even though, I like it, I'm convinced it will be laughed and pointed at when it gets among all the other quilters pieces. I surely won't win for best craftsmanship, but maybe for creativity. Who knows. No matter what though, they will be using all the blocks to make a quilt to send to Haiti and that makes me happy. I'm taking it down to the fabric store tomorrow (last day to turn things in is on Sunday) and the winners will be announced March 15. Wish me luck!

Sunday, January 17, 2010

A Tie For My Little Guy


It's been killing me that I haven't made Henry anything to wear. I sew tons of girl clothes, but for a boy, I didn't know where to start. The options for cute boy wear are a little more limited in my opinion. But when I saw a pattern for ties at my favorite fabric store, I knew I would become hooked. Nothing says "heart melter" like a little guy in a tie. I'm a sucker for little boys looking like grown ups.
I picked up the adorable seahorse fabric for Henry's nursery, but I decided to wait until we move to decorate a room for him. It's SO hard for me to find boy fabric I like. It has to be the right colors, masculine, not too gimmicky, not too baby, but still cute. Anyway, I loved this fabric right away and bought a bunch. It's been taunting me for months to do something with it. I thought a tie would be perfect.
And yes, I know, this is probably nothing new or exciting to most of you, but to me, a new mother to a boy, this is both new and exciting. I made it in no time and want to make dozens more. I'm actually thinking about taking orders (Is that illegal? I looked on the pattern but I don't see anything about selling products made from the pattern.) Hmm, I wonder how much I could charge?

Friday, December 18, 2009

Drawstring Game Bag


When I was a little girl, I would stay the night over at my grandparents home often. I loved it because my grandma had few toys, but they were classics. She had wonderful paper dolls and little glass figurines from Brazil (that I'm dying to find for my own children). Well, she also had a deck of playing cards which had a boy and then a girl from different countries. We would play go fish and try and match the boy to the girl. I loved these cards and the outfits that they were wearing. The ones that I remember most vividly is Holland and Australia.

Just in September we went to my grandparents in California and I looked at those cards and wrote down all the information to try and get myself a copy. I have the fondest memories playing with them.

A few weeks ago, I was wandering through a fabric store when I looked down and saw this Alexander Henry fabric that looked exactly like the people on the cards at my grandma's. I got misty eyed from all the nostalgia I was feeling just looking at it. I bought some not knowing what I was going to do with it.

Then a few days ago, I was putting some of the girls games away in the closet. What a mess that closet was. We have limited space and things were piled everywhere and completely unorganized. I took out all our mangled puzzle boxes, cut the picture off the box and put them all in separate Ziploc bags. I decided the perfect project for my fabric. A drawstring game bag. I followed this tutorial but made it much bigger and added pom poms. So now, instead of having piles of boxes in our closet where my girls can't reach them, we have this bag on the floor that is easy to get too and much tidier. I love that we now have a little organization in our game closet and that I get to see this bag and think of my childhood. I made a miniature version of this bag and sent it to my grandma for her to hold her many decks of cards. I can't wait until she gets it.

Thursday, December 3, 2009

Ruffled Tulle Tiered Skirt Instructions


I mentioned posting a tutorial for the tiered skirts I made before. I decided not to, because I really didn't have much of a tutorial. I basically used someone elses tutorial for the skirt and added tulle. But after showing a couple friends, receiving a few e-mails requesting instructions, and a couple phone calls asking for the how-to, I thought I would just post what I did here. It's not a tutorial, because I never took pictures as I was making one, but here are some written instructions. I think you'll be just fine without the pictures. Just keep in mind that this is how I did it. It may not be right or the best way to do it, but it's what works for me, so I can do it however I want. Kidding, kidding. (kinda!)

To begin you'll need about 1 yard of cotton fabric and a minimum of two yards of tulle (you may want a bit more to be safe, because two yards will barely get you there, but it will work). The instructions for this skirt should fit an average 3-5 year old.

First, read the instructions here on how to make a tiered skirt. I will then explain my modifications after you read through the tutorial...go ahead, read that tutorial, things will make a LOT more sense if you do that first.

Follow the instructions for the first three tiers in the tutorial, but omit the ruffle. Instead, add another tier. I took the length of the strip in the last tier (67.5) and multiplied it by 1.5. That means you should have a length of fabric 101.25 by 5 inches. (I had to piece two lengths together to get it that long, but that's okay, it's covered up with tulle in the end and you'll never see the seam). Hem the bottom.

Then, take your tulle and cut it into 3 inch strips the length of the yardage so you have very long strips of tulle. I then layered two strips of tulle on top of one another and ran it through my machine right down the middle on the longest stitch length and highest tension. Don't backstitch at all. Pull the thread to ruffle the tulle. If your machine is anything like mine, the tulle will pretty much be ruffled as you sew it. Do this for all the strips you have.

The tulle is then going to be placed on the skirt at the seams of each tier. Therefore, you will have three rows of tulle. Place the stitch you put in the tulle right on the seam of the skirt and stitch back over that exact stitch. Be sure to set your machine back to a normal tension and stitch length. (I know this sounds confusing, but you should see what I mean when you are at that point in the process. Enlarge the picture to get a better idea of where the tulle lies on the skirt.) You'll probably have to cut the tulle at some points to piece it onto the skirt to get it to go all the way around on all three rows. Once the tulle is attached, presto, you have your own ruffled tulle tiered skirt. And the little girls in your life will want to wear it everyday. Be sure to make multiples in every color!

Any questions?

Sunday, November 15, 2009

Baby Doll Bassinet TUTORIAL

'Tis the season. It's a giving season and I am in the spirit, so I decided that I will post this tutorial. Keep in mind, I have never posted a tutorial before. If something doesn't make sense or you have any questions, just leave me a comment and I will reply in the comments and fix the tutorial as best I can. Also, please link back to this post if you are posting your finished project so others can find the tutorial as well. And only use this tutorial for personal use...that would be the right thing to do. I would love to see your finished projects too, so leave links to yours in the comments. I hope they make lots of little girls happy! Enjoy!

Supplies:

You will need two coordinating fabrics. One for the outside and one for the lining. From each fabric you will need to cut-
14" x 5" for the hood
14" x 2" for each strap (2)
21" x 17" for the basket
18" (half a yard) of coordinating lace for the hood.
High loft quilter's batting

* All seam are 1/4 ".

First, I choose to quilt the batting onto the outside fabric to give it a more "moses basket" feel. This is obviously optional, and takes a significant amount of time, but I think it is definitely worth it. And it is easy, just time consuming. Cut your batting to fit each piece of outside fabric. Starting on one corner, sew on the diagonal across the fabric. Repeat sewing parallel stitches every inch. Once you make it across the fabric, rotate the fabric and repeat sewing one inch stitches perpendicular to the newly existing stitches. Do this for the straps and basket portions of fabric before you do anything else.

(These pictures are examples of what it looks like to quilt the fabric and batting, do not quilt the hood before reading the "hood" section first).

FOR THE HOOD:

Take the rectangular piece of fabric for the hood and fold in half. Grab a bowl or something with a curve to trace onto your fabric so you can cut a curve in the hood. It should go from the bottom corner to pretty close to the top. Cut hood. Then quilt 1 inch triangles on the outside fabric with batting. Line up the lace with raw curved edge. Pin. Lay lining fabric over, right side facing. Pin. Sew only the curved part of the hood. Remove pins, turn and press.

FOR THE STRAPS:

With the outside fabric quilted, lay lining fabric on top, right sides together. Pin. Sew along the long sides of straps. Repeat for second strap. Using a chopstick (or something like that) turn straps and press.

FOR THE BASKET:

Once you have the outside quilted cut 4" squares from each corner of both the lining and outside fabric. At this point, I got my girls names embroidered to the quilted fabric (just be sure to have it embroidered correctly so you don't end up with the name upside down- you'll know which way is "up" by reading ahead to next step).

Next, line up cut edges from each corner. Pin. Sew together. (Before you embroider, pin sides so you know where the name is going, then remove pins for the embroider). Pin and sew lining fabric as well.

You should now have one hood, two straps, outside basket and lining basket. You're getting close!

Next, find the center of the top of the outside basket and find the center of the hood. Line those two points up and pin the hood on the basket, upside down, so raw edges line up and matching fabrics are facing one another. Where the hood ends, right next to it, pin one side of the strap with right sides facing. Leave about 4" then pin the other side of the strap to basket with right sides facing. Repeat on the other side with other strap.

Finally, turn lining fabric inside out. Pin onto basket being sure to line up those 4" seams as best as possible. Starting at the bottom (not where the hood is) start sewing around basket. Leave about a 4" hole at the end to turn basket through. Turn basket. Because I am lazy and avoid hand sewing at all costs, I then pin the hole, press and sew a stitch around the entire basket part again being sure to catch and close the hole. Also, sew a stitch around the curved part of the hood to finish it off.

Lastly, I decided to sew "in the ditch" of those 4" seams on the corner so that the lining would stay put a little better. If my seams didn't line up perfectly, I pinned them so they were perfect (as possible) and sewed in the ditch of the outside fabric. It's okay if it's a little off on the inside since you can't see it very well, but it's important to keep the seam on the outside as hidden as possible. Does that make sense? You'll know what I mean when you get there and actually have your finished bassinet in hand...I hope. Let me know if this part isn't clear.

And viola! You are now the proud owner of a very cute, hand made, storable baby bassinet. Congratulations! I hope the little princess in you life loves it
Disclaimer: This is intended for dolls, not real babies. I shouldn't even have to write that, but we all know there are some not-so-smart people out there.

Monday, November 9, 2009

Baby Doll Bassinet

Mine from when I was a little girl:
I like classic, simple toys. Toys that remain popular through generations and generations. That's why I made the playhouse tent, mail center, and bean bags. These things aren't made with bells or whistles or lights. They don't have batteries or speaking voices coming from them. They are just good old fashion fun. And I think good old fashion fun is a great way to get kids imaginations working. These kinds of toys serve a different purpose each time you play with them. They can be anything you want them to be. The playhouse tent can be a cave, or a doctor's office. The mail can be love letters, or homework. The bean bags can be used for hopscotch or hot potato. I love to watch my children and their imaginations run wild. That means they're exploring and developing and growing. I like that I played with bean bags and had a table tent. I love imagining my grand children playing with the things I've made. Remaking classic toys for my children to play with really makes me happy.

(Sorry to go off on a little tangent)

But that's why I had to make a bassinet for my girls dolls. Last Spring we went to Arizona and Gwen toted this little doll carrier around the entire time. She slept with it right next to her and filled it with all kinds of treasures. This was my little bassinet as a girl. I vividly remember housing my Cabbage Patch dolls in it. Wasn't my mom brilliant to keep it? Thank goodness she did. I love that she made it and kept it after all these years.

Well, I asked my mom if we could bring it home so that I could recreate one for each of the girls. After all these months (and finally getting my sewing machine fixed) I have made the girls their very own doll bassinet (they're for Christmas, sshh, don't tell).

They were quite simple to make. I actually have a tutorial for them. Step by step instructions that anyone at any skill level could follow.

But I have reservations about posting a tutorial. Here's why,

1. I am a self taught seamstress. It's something I tried once on a boring day when I was pregnant with my first baby almost 5 years ago. I don't claim to be very knowledgeable. And I do things the way they make sense in my head. It might be the "wrong" way to do it, and there may be a more simple way to do them, but I just do it the way I can imagine it. If I post a tutorial, you might see that I am crazy and go about sewing all wrong. But the outcome always works. I just don't know if I want to expose myself like that or not. What if you laugh at me?

2. And most importantly, I don't like it when someone takes another persons idea and claims them as their own, never giving credit to the original person. I didn't understand this before, but I do now. This is the first time I would post something that I didn't use someone else's tutorial for. This was something I didn't look on the Internet and find. This was all mine (and my mom's, since I used her work as a pattern). I don't want someone taking credit for this. I don't want someone making money off this. That would really be dishonest. And I really dislike dishonesty. But I know it happens, and that's why I hesitate to post a tutorial. How hard is it to give credit where credit is due? A little link back to a posted tutorial is not a big deal.

On the other hand, I love when people share their tutorials. I wouldn't sew half the things I sew without them. THere are some amazingly talent people out there with great ideas. I usually change them up to fit me and my personality and style, but I do link back to the original. Why can't everyone do that? Seriously?

Anyway, I do have a tutorial. Should I post it? What are the thoughts out there on tutorials and other people taking those tutorials and claiming ideas as their own? And would you laugh at me?

PS. Just the other day I saw this at Pottery Barn Kids. I was half way through making my own and liked the idea of having them embroidered with my girls name. So I quickly got mine embroidered before I finished putting them together. These sure are cute, but I can promise you that you can make your own for well under $29.00 and they would be original. Plus, I like picking my own fabric, that's half the fun of sewing.

Wednesday, September 16, 2009

Tulle Twirl Skirt

Last year I made a tulle skirt that I was dying to have for my girls. I liked the idea behind it, but it wasn't executed perfectly. I was new to using my ruffle foot and although the skirt was really cute, it wasn't perfect and it become more of a dress up skirt (or dress).

I have wanted to try to make a new one ever since. This time, I am much more pleased with the outcome. I love tulle on little girls. I am planning on using it in their clothing for as long as they'll let me get away with it.

I have a few more ideas in my head that I think will help me achieve the perfect tulle twirl skirt. Probably for the holidays I'll try again with fun colors.

I am showing some friends tomorrow how to make these, but was wondering if there is any interest in a tutorial? I have never done one before, but I may give it a try. It's not hard, and paying $5-$10 for materials sure beats a $35 price tag at the mall.

I know the details of the ruffles and tulle are hard to see in the white, but click on the picture to enlarge and you'll have a better idea of what they look like.

Crazy Quilt

For my mom's birthday I decided I wanted to make her a quilt. I can now say that I have successful made my first non square quilt. I have never done a binding before and for not having anyone show me, I think it turned pretty well. The quilt pattern was a little "crazy", but it was really fun to try something different. I like the colors and hope that my mom has stayed warm under it. I hear it's cold in Arizona in August.

Wednesday, June 10, 2009

Picnic Quilt


I'm a hoarder. Not the kind of hoarder who has things stuffed in her closest from the 90's, but the kind that can't let materials go to waste. The kind of hoarder who holds onto 4 inches of ric rac "just in case" or the strip of 2 inch wide fabric that I love and can't bring myself to throw away. I always buy more fabric than I need, because I love having leftovers for those spontaneous projects.

Needless to say, my cedar chest was overflowing with remnant fabric that I had to hold onto, but never actually did anything with.

The girls and I have been meeting friends at the park, spray fountains, for picnics and barbeque's. And each time we go, I think how much I hate our pathetic excuses for picnic blankets. We have fabulous tie quilts from Joe's mom, but they could fit on a California King sized bed. They're way to big for me to carry when we walk to the park. Then we have throw blankets that I just don't like anymore for my house and so they're my picnic blankets. But we can all barely fit on those. They're tiny. And not really meant for dirt and grass.

So the other day I decided I was just going to make a scrap picnic blanket for us this summer. Lots of fabric cut into seven inch squares, with a few smaller squares thrown in. I have a simple, clean cut sort of style, so I wanted it to be straight forward and basic. Nothing complicated or time consuming. I love the randomness.

A few days of sewing, a Friday fun day held on Thursday, and we have a great picnic blanket for the summer. I decided to add the large ric rac, because it seems I can't get over my love for it. Then I tied the corners with yarn I had laying around.

I am so happy to finally have a picnic blanket I love. It holds a sentimental value too. I can look down and see the fabric I made the girls first Easter dresses with, or the spool people bits and pieces, or Henry's car seat cover, or the Black Apple dolls I made for the girls for Valentines day that they love. And the girls love it too, because they recognize that fabric as well and tell me where it's from.

I think this is a picnic blanket that I won't ever let go of.

Saturday, April 25, 2009

Pet Store


"You know what I want to be when I grow up?" Gabriella asked one afternoon.

I figured she would say a doctor like daddy, or a librarian like she had said days before. She's mentioned being a school teacher or a police officer. I was expecting something along those lines.

Nope. It wasn't any of the above. She told me she wanted to be "a pet owner."

I smiled that being a pet owner was her goal in life, her career even. She must know full well that it's not going to happen under my roof.

We were playing at home one morning after rushing and leaving the house early for weeks straight. I was playing baby Cabbage Patch dolls with the girls when Gabs suggested in her best Cabbage Patch voice that our dolls go to the pet store.

That's when I remembered this wood carrying case I had kept in the garage since Christmas. It originally stored magnet dolls, but the plastic that slid over it had broke and it was no longer a good carrying case. I kept it because I knew something great would come of it. I was thinking of painting it and hanging it near my sewing machine to store thimbles and thread and some of the old wooden spools I have. But nothing had come of it, until yesterday.

I got it out and we cut scrapbook paper to fit each "kennel". I got down my bag of notions and the girls picked their do-dads to decorate it with. Gabriella got out her markers and colored pictures to decorate the walls of the store.

I suggested the store name "GG's" but Gabriella wanted bigger. Brighter. She said "The GG Sisters Pet-Pet Store." So that's what we did. Every princess, polly pocket and cabbage patch doll has been to that pet store a million times to buy a new pet since.

This didn't require any creativity of special skill. It was completely free and finished within an hour. It's hardly worthy of being on a so-called craft blog, but it was something we worked on together and something the girls felt like they created. It isn't glamorous or fancy. But it was fun. And it reminded me what I should be doing more often with my free time. Playing with my kids and helping them use their imagination.


Mission accomplished.

Thursday, April 16, 2009

Hooded Bath Towels

I know I know. I'm sick of the peanut butter balls too. It's been awhile. Trust me, I've been sewing. Lots and lots of sewing. Just not a whole lot of motivation to take pictures and post my happenings. Some friends and I have started "Friday Fun Day" where we do a project each week. We've tackled a lot of sewing. Maybe one day I'll get around to actually posting pictures. Maybe.

One thing that I have been wanting to do for years are hooded bath towels. My friend showed us how one Friday and the girls love their new towels with hoods. They were simple and easy and fun to individualize with ric rac and pom poms. I know hooded towels aren't anything new or original, but here they are none the less.

I don't know if you can actually get a good look at them, because the only pictures I have of them are from Henry's first sponge bath. Needless to say, he hated it and the girls could hardly watch with all the screaming...but the towels sure looked cute!

Friday, December 12, 2008

Christmas Treats


Here is just an idea, in case you are stumped and are looking for an easy way to wrap up some holiday goodness for friends and neighbors. It's quick, easy, simple, inexpensive, and cute! Just what we need things to be this time of year.

These take out boxes can be found at the craft store in a variety of colors and designs for about $1.25. I made snowflake fans using some Amy Butler scrapbook paper and made gift tags to be tied on the handle. Another idea is to spray paint the lids to mason canning jars and fill the jars with the treats. This year I used Ivy Leaf Krylon spray paint for the lids and added the snowflakes and tags. It's just as cute, and a little cheaper way to go since you can find a dozen of canning jars fairly cheap.

The boxes were of course filled with my families favorite traditional holiday treat...homemade peanut butter balls! It's always fun to drive the girls around at night listening to Christmas music, delivering goodies and seeing all the neighborhood Christmas lights and decorations!

And who doesn't love receiving Christmas treats?